Mapping hardware key numbers
The PicoSplit firmware is designed to make the wiring of the keyboard as simple as possible. For example: the keys don't have to be connected to specific pins of the microcontroller in order to match a certain key arrangement. This makes it easier to build handwired keyboards, because you can connect any key to any pin, as long as you use the pins you specified in the firmware.
The numbers you see when doing the quick function test are hardware key numbers. These hardware key numbers are mapped to standardized key numbers, which are used in the keyboard layout definition file (layout.js). This way you can use the same layout with differently wired keyboards.
The mapping from hardware key numbers to layout key numbers cannot be done automatically, because the system does not know how the keys are wired. But there is a tool for this task. Open the file PinMapper.html in a web browser and you will see the following page:

These are all the keys on the PicoSplit keyboard. The small number in the top left corner is the key number which is used inside the layout definition file (layout.js). To map the hardware key numbers to those numbers, press the key on your keyboard that is highlighted in blue.
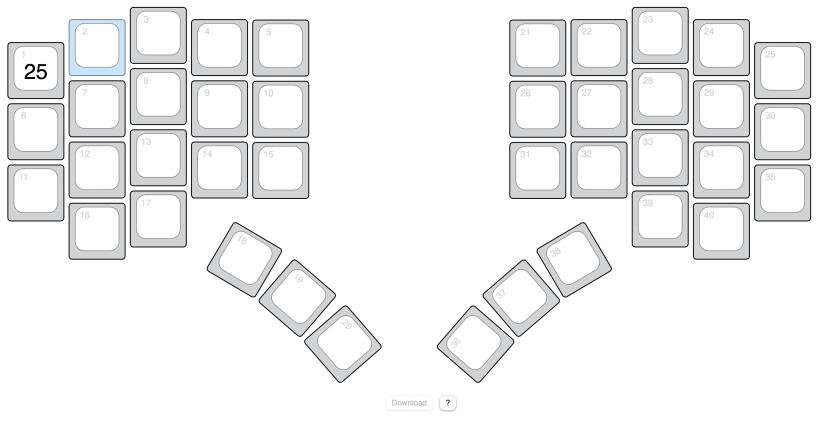
The recorded hardware key number is now visible at the center of the key (here 25). Then the next key is highlighted. Continue until you have pressed all the keys. You can always select a key with the mouse to change incorrect entries. When you have pressed all the keys, click the Download button. This will save a mapping.js file in your downloads folder. Copy this file to the memory drive of your keyboard.
If a mapping.js file exists, the keyboard stops emitting hardware key numbers and instead emits the key codes defined by the rules in layout.js.